
My Listings is where you can view and edit all of your listing information, to maximize your efficiency in Touchbase.
To access your listings, open your Touchbase app and select My Listings from the main menu.
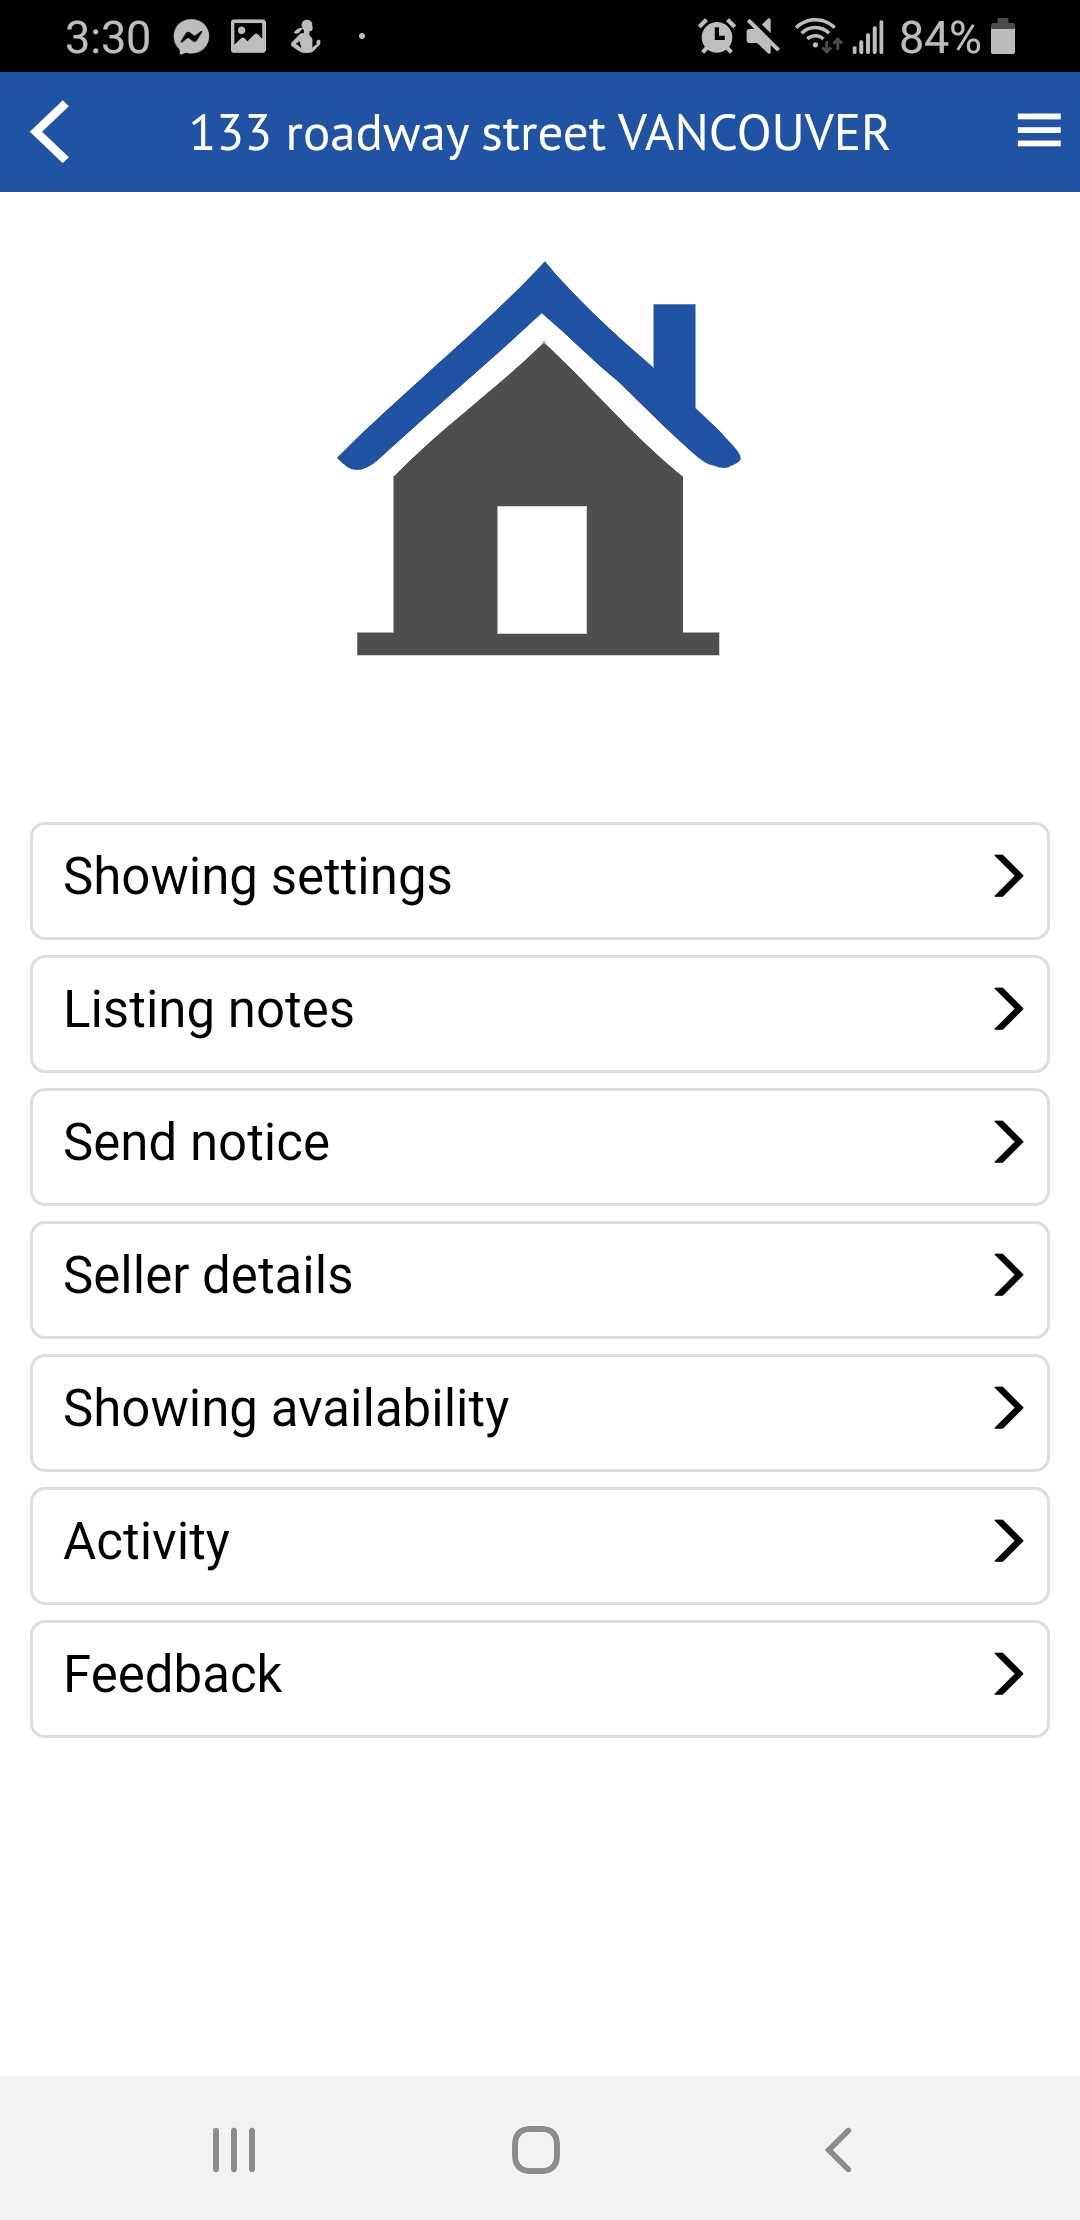
Select the listing you want to customize. You'll then see a list of options:
Each of these options are useful tools that, when used properly, can save you enormous amounts of time.
Setting up your listings in advance can save you time, energy, and improve productivity. How?
By entering all the information once, you can eliminate several steps in the showing process. You'll no longer need to type out things like ''Off lights. Leave card. Don't let the cat out. Lockbox is on the left of the mailbox.'' each time you confirm a showing. Better yet, you can even auto-confirm showings, so that all that information sends automatically! Here's how.
To access your showing settings, go to the main menu of your Touchbase app, and click My Listings.
Choose the listing you want to modify and click on Showing settings.
Under Automatic note sent with confirmation, enter all the information that you would normally type out each time someone requests to show your property.
You can then enter the lockbox code if applicable.
This option is great for properties with families, or who simply want to have a certain amount of time to prepare for each visit. You can choose a delay (up to 48 hours) that must be respected when requesting to show your property.
For example, if you choose a 24-hour delay, and it is 5:00 p.m., the buyer agent would have to request to show any time after 5 p.m. the following day. If the buyer agent selects a time that is less than 24 hours into the future, they will not be able to send the request until they modify the requested time. In this way, you can guarantee that there are no last-minute showings that will displease your seller.
Check this box to allow more than one showing at the same time. If this box is not checked, buyer agents will have to choose a different time when sending a showing request.
Listing notes are specific to each property, and can be seen both within Touchbase and via your MLS. These notes are useful in that they are visible before a showing request is even sent. This can help eliminate redundant or useless steps in the showing process. Things like ''Property is vacant, all showings are auto-confirmed.'' are great examples of useful listing notes.
You can set these up by opening your Touchbase app and selecting My listings > Choose the listing in question > Listing notes.
To add a new note, click on Add a note under Actions. Enter the note you would like to display prior to the showing request (up to 250 characters).
You can customize your notes so that they are displayed only during certain days and/or times. To do this, simply enter the From and To period throughout which you want the note to appear. For example, you could choose December 1st to December 20th.
To display the note until further notice, simply click on the toggle icon in the Custom period button so it shows All the time.
You can take the covering period a step further, by choosing a time of day and selecting specific days of the week.
For example, you could choose to align the note with the aforementioned 'auto-confirmed' time slots. Let's say you made pre-approved all showings from 8 a.m. to 5 p.m., 7 days per week because no one is living in the property. You could then choose to show the note from 8 a.m. to 5 p.m. every day.
You could even choose to add a second note, that only appears outside of those hours, explaining that showings are auto-confirmed between 8 and 5.
This is just one example of the many uses of a custom covering period.
To display the listing note 24 hours/day, simple leave the toggle under Filtering to No filter.
Be sure to click Save when you're done.
Send a group message to people who have shown interest in one of your listings, to advise them of any changes, such as:
To access this feature, open your Touchbase mobile app to Listings > Select the listing in question > Send notice.
Under recipients, un-check anyone to whom you do not want to send the message. Everyone will be selected by default. This includes anyone who has:
Once you have chosen your recipients, enter the message you would like to send. As is the norm with Touchbase, each recipient will receive the message on the device they've set up in their Touchbase profile.
Enter your callback number (your default number is autopopulated).
Press Send or select the Send Later option.
Have you ever worked with a seller who wanted to be heavily involved in the showing process?
This kind of client enjoys our Seller in the loop features, which allows them to receive and confirm showing requests via text message or email.
Here's how to set it up:
You can also choose the 'On demand' option, which is essentially the same as forwarding a message/request. Use this option for feedback, and you'll be able to choose whether or not to forward the message to your seller.
One of the best ways to save time and automated your redundant actions in Touchbase is to set up your showing availability calendar for each of your listings.
This availability calendar allows you to pre-approve or non-confirm showings. You can even set up an open house.
A great example of a scenario where this feature comes in handy: vacant properties. If you don't want to constantly have to confirm showings, you can set all 7 days of the week to auto-confirm (pre-approve) showing requests.
To do this, access the My listings section in the main menu of your Touchbase app.
If you know that your seller teaches piano every Wednesday from 3 p.m. to 6 p.m. and prefers not to have any visitors during that time, you can automatically reject incoming showing requests by blocking off this time slot in your availability calendar.
To do this, access the My listings section in the main menu of your Touchbase app.
An open house is easy to advertise in Touchbase. Simply follow the same steps as you would for any other type of availability. The main difference is that you will likely set the Repeat option to Never.
As is the case with Pre-approved time slots, showing requests sent during the Open house slot will automatically be approved.
To set up an open house in Touchbase, access the My listings section in the main menu of your Touchbase app.
When you set up your availability calendar, listing notes, and user notes, they are visible not only to agents in Touchbase, but also when being viewed via your MLS.
This section shows you an overview of your past and future showings. This is useful when wanting to quickly see if you have any showing requests that need to be confirmed, cancelled or modified.
If you select one of the showings in the list, Touchbase will open up the conversation so that you can see all the messages that have been sent so far. You can then take action, such as confirming the showing, replying to the last message, and so on.
An activity report is also available for all your listings in the reports section.
Feedback is an important part of the showing process for many agents. In order to offer impeccable service, it is a good idea to ask specific questions about each listing and send an automated showing feedback request after each visit. The Feedback section in My listings is used for seeing an overview of all the feedback you have received for that listing.
You can learn more about setting up custom feedback forms in this article.